Editing still images

Correcting brightness and contrast
The brightness and contrast of still images can be corrected.
-
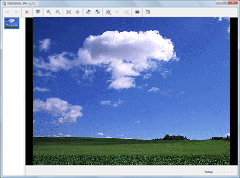
In the main window, double-click the still image you want to edit to display it in the view image window.
-
Click
 at the top of the window, select [Brightness Correction].
The brightness controller is displayed.
at the top of the window, select [Brightness Correction].
The brightness controller is displayed. -
Correct the still image using the brightness controller.
[Dark areas] Corrects dark areas of still images. Drag the slider to the right to brighten dark areas, or to the left to darken them.  Hint
Hint- This tool is particularly useful for correcting still images shot with a lot of backlighting.
[Entire image] Corrects the entire still image. Drag the slider to the right to brighten the picture, or to the left to darken it. [Light areas] Corrects light areas of the still image. Drag the slider to the right to brighten light areas, or to the left to darken them. [Contrast] Adjusts the contrast of the entire still image. Drag the slider to the right to increase the contrast between light and dark areas of the still image. Drag it to the left to reduce the contrast between light and dark areas. -
After correcting the image, click [OK].
The image correction window closes.
-
Click
 at the top of the window to save the corrected still image.
Click the and the save menu appears. To overwrite the original image file, select [Save] from the save menu. To save the corrected image as a new image file with a new name, select [Save as] from the save menu.
at the top of the window to save the corrected still image.
Click the and the save menu appears. To overwrite the original image file, select [Save] from the save menu. To save the corrected image as a new image file with a new name, select [Save as] from the save menu.
 Notes
Notes
- You cannot edit Multi Burst images or RAW mode images.
- If you edit a still image which contains Voice, the editing is not reflected on the image displayed during playback.
Hint
- Click
 to return the image to its original condition.
|
Copyright 2008 Sony Corporation
|
P0200-01-US
|