Editing still images

Adjusting with the tone curve
Adjusts the brightness of each channel.
-
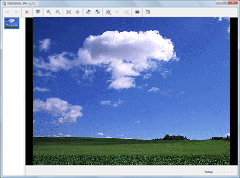
In the main window, double-click the still image you want to edit to display it in the view image window.
-
Click
 at the top of the window, select [Tone Curve].
The correction controller for editing the tone curve is displayed.
at the top of the window, select [Tone Curve].
The correction controller for editing the tone curve is displayed. -
Correct the still image using the correction controller.
The histogram and tone curve for the channel being displayed in the drop-down list are shown. You can adjust the tone curve for each channel.
The horizontal axis shows the brightness (level) of the input image (original still image), and the vertical axis shows the brightness (level) of the output image (still image after adjustment). Since the brightness (level) of the input image and output image are the same before adjustment, the tone curve is a straight line drawn at a 45 degree angle, from bottom left to top right.
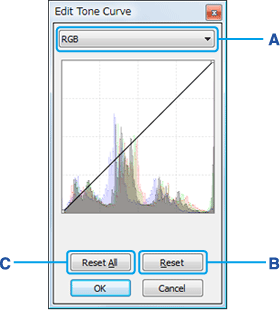
Select the channel that you want to adjust from the drop-down list, and by moving the control point on the tone curve, change the shape of the tone curve to adjust the brightness of the still image. When you move the mouse cursor to the top of the tone curve, a cross appears and when you click, a new control point will be added. Drag the control point to the upper left to make the image brighter, and drag to the lower right to make the image darker.A Drop-down list You can select the channel that you want to adjust from [RGB], [R (red)], [G (Green)], [B (Blue)]. The tone curve for the selected channel is displayed in front of the adjustment window below.
B [Reset] This returns the tone curve of the selected channel to its original condition (45 degree diagonal).
C [Reset All] Returns all of the [RGB], [R (Red)], [G (Green)], [B (Blue)] settings to straight lines. (The tone curve returns to a straight line at a 45 degree angle to the upper right)  Hints
Hints- You can drag the control point to move it. However, you cannot move a point across its neighboring point in the horizontal direction.
- You can delete a control point by double-clicking it or dropping it outside the graph.
-
After correcting the image, click [OK].
The image correction window closes.
-
Click
 at the top of the window to save the corrected still image.
Click the and the save menu appears. To overwrite the original image file, select [Save] from the save menu. To save the corrected image as a new image file with a new name, select [Save as] from the save menu.
at the top of the window to save the corrected still image.
Click the and the save menu appears. To overwrite the original image file, select [Save] from the save menu. To save the corrected image as a new image file with a new name, select [Save as] from the save menu.
 Notes
Notes
- You cannot edit Multi Burst images or RAW mode images.
- If you edit a still image which contains Voice, the editing is not reflected on the image displayed during playback.
Hint
- Click
 to return the image to its original condition.
|
Copyright 2008 Sony Corporation
|
P0203-01-US
|