Creating a Blu-ray Disc with high definition image quality (HD)
 Creating a Blu-ray Disc in high definition 3D or high definition (60p/50p)
 Changing the settings for creating a Blu-ray Disc
You can create a Blu-ray Disc with high definition image quality (HD) by putting together AVCHD format videos imported to your computer.
To create a Blu-ray Disc, you must first install a specific add-on software.
For details, refer to the following website.
http://support.d-imaging.sony.co.jp/BDUW/
-
Click
 (Create Discs) at the top of the main window.
 -
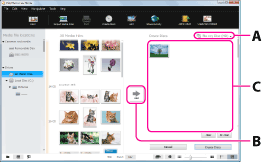
Select [Blu-ray Disc (HD)] from the drop-down list used for selecting a disc (A).
-
Select the AVCHD format videos you want to write to the disc from the thumbnails, and click [Add] (B).
The selected videos are added to the list of videos to be written (C).- You can also add videos by dragging and dropping thumbnails.
-
After adding all the videos you want to write to the disc, click [Create Disc].
The disc creation window is displayed.
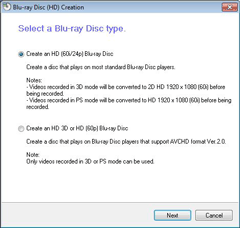
Select the type of Blu-ray Disc you want to create, and click [Next].
The window used to select videos is displayed.
Confirm the videos to be written to the Blu-ray Disc.
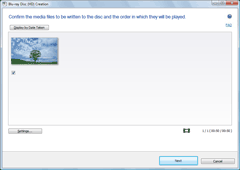
- To add videos to the previously selected ones, select the videos you want to add in the main window and drag and drop onto this window.
- You can also write only the desired segments of the selected video to a Blu-ray Disc. <Details>
- Clicking [Display by Date Taken] automatically changes the order of videos into the order of the date on which they were taken.
- Clicking [Settings] lets you set the various operations that take place upon the first play of a disc as well as the video quality, etc.
- By clearing the [Seamless Disc Settings] checkbox in the window displayed when you click [Settings], you can reduce the size of the temporary storage area used for creating a disc. The checkbox is checked by default.
Click [Next].
The menu image of the Blu-ray Disc to be created is displayed.
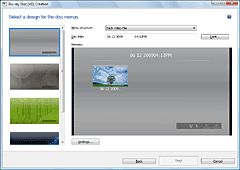
- When you create a Blu-ray Disc in high definition 3D or high definition (60p/50p), this step is not required because this type of Blu-ray Disc format does not have a menu screen.
- Clicking the [Menu structure] drop-down list lets you select the method used to create the title of the disc menu.
- Clicking [Font] lets you select the text color of the disc name and title, etc.
Confirm the menu style to be created, and click [Start].
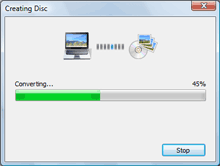
Blu-ray Disc creation begins.
Notes
- Videos other than those recorded in the AVCHD format cannot be written to a disc.
- The conversion of videos recorded using the PS mode may take some time.
- To create a Blu-ray Disc, a Blu-ray burner drive must be connected to the computer.
- Creating a Blu-ray Disc may take some time.
- Blu-ray Discs can be written to only once.
Creating a Blu-ray Disc in high definition 3D or high definition (60p/50p)
By selecting [Create an HD 3D or HD (60p) Blu-ray Disc] or [Create an HD 3D or HD (50p) Blu-ray Disc] in step 5, you can create a disc without converting the recording mode of the videos you use.
The disc created can be played back with a Blu-ray Disc player supporting AVCHD format Ver.2.0.
Note
- A Blu-ray Disc in high definition 3D or high definition (60p/50p) does not have a menu screen, so you cannot edit the menu screen. The menu screen display of the disc differs depending on the player you use.
Changing the settings for creating a Blu-ray Disc
When creating a Blu-ray Disc with high definition image quality (HD), the settings required for Blu-ray Disc creation can be set on the Settings window displayed by clicking [Settings] on the select video window.
| [General] |
The drive to use for writing and storage location for temporary files can be set. To change the drive to use for writing, select the drive to use from the drop-down list. To change the storage location for temporary files, select the folder from the folder selecting window displayed by clicking [Browse]. |
| [Disc creation] |
Playback behavior, video format, etc., can be set. [When a disc is played]: Select either to display the menu window or start playback as the initial disc play behavior, and then click the appropriate radio button. [Disc video format]: Select the video format according to the video format and the TV color system used in your local area, and then click the appropriate radio button. (Since this setting is usually configured during installation, there may be no need to change it.) [Seamless Disc Settings]: By putting a check, you can create a disc that plays the video seamlessly and smoothly. The checkbox is checked by default. It may take longer and require large amounts of temporary folder space to create a seamless disc. [Audio Mode Settings]: By putting a check, you can convert the audio of all videos to 2 ch stereo and create a disc. When this setting is selected, discs will take longer to create. |