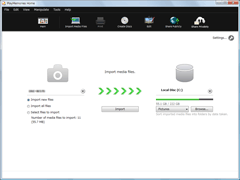
Importing videos and photos from your camera to a computer
You can import videos and photos recorded on your camera by connecting your camera to a computer.
-
Turn on your camera, and connect it to the computer.
The video/photo import window is displayed on the screen of the computer.

-
Select the destination drive and folder, and the import method.
- If you select [Select files to import], select videos or photos to be imported from the video/photo selection area. By double-clicking a video or photo, you can enlarge it.
- If you click [Settings] and put a check in the [Delete imported media files from the device or media] checkbox, videos and photos will be deleted from your camera after they have been imported to your computer.
-
Click [Import].
When the import of the data is completed, the main window is displayed.
 Hints
Hints
- For details on the import window, see Parts and controls of the import window.
- For how to connect your camera to a computer, refer to the supplied Operating Guide.
- If you connect your camera to your computer using a Wi-Fi connection, videos and photos will be imported to the computer only if you select the video import function on your camera. Only videos and photos that have not previously been imported will be imported in this operation, and a progress indicator will be displayed on the window. (Only for models that support the Wi-Fi import function of “PlayMemories Home”)
Notes
- If you are using a camera that does not have a USB power supply function, we recommend that you use an AC Adaptor as the power source. If you do not have or cannot use an AC adaptor, use a fully charged battery.
- If you have not put a check in the [Import with PlayMemories Home when a device is connected] checkbox on the window displayed when you selected [Settings] - [Import] in the [Tools] menu, the import window will not be displayed. In this case, start “PlayMemories Home,” and click
 (Import Media Files) on the top of the main window.